O.K., back at it!
And not NEARLY as many disasters.
And not NEARLY as many disasters.
This get transfer thing is going to take about 100 more tries to perfect it. And even then, I think, who knows?!
I learned this technique from an online class by Julie Prichard, of Land of Lost Luggage. She offers several classes in conjunction with Chris Cozen. They are wonderful.
Here is my 2nd attempt:
When you xerox your transfer image, use a toner printer. I take mine down to our local Staples. I have also been told to use bright white paper. I would like to try with a little bit lighter weight paper to see if it makes much of a difference.
When using words, you need to make a mirror image of your word(s).
Then it will read from left to right when you lay it down.
Small is helpful when beginning this.
Here, I spread Golden's Soft Gel Medium and laid the paper on top. I then used a wide, plastic palette knife to go over the design. It's a little like using Modge Podge, with one LARGE exception.
Do NOT get the gel medium on top of your transfer piece. After every swipe with the palette knife, wipe it off with a paper towel, then go over the piece again.
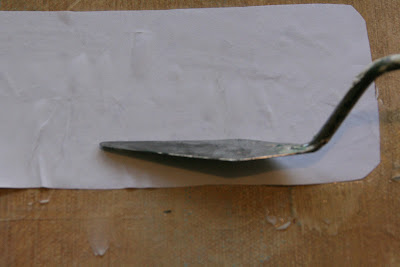
This picture shows a metal palette knife, and it was too thin and I thought it would rip the paper. I ended up using the white palette knife up above. You can also use an old credit card.
I would also recommend when you lay your transfer piece down, begin laying it down in the middle. When I just put the transfer image down and didn't pay attention to the way it hit the gel, it buckled and then I couldn't get it to stick, or then my paper had a crease in it.
Let this dry overnight. I have done this with just waiting 2-3 hours, but without much luck.
Well, more like with about as much luck as I'm having now.
The next step is to get your image wet.
I use a spray bottle and spray water over the paper.
You can see how it begins to lift. You will be rubbing your finger in small, circular motions across the paper. I think the trick here is to not rub too hard. If this happens, you run the risk of yanking up the whole image. It needs to come off in light, thin layers.
Or, even if you do use light, circular motions, the paper seems to have a life of it's own and comes off too fast.
This is what happens.
Bummer. Then you have to think of ways to either fix it, or collage over it.
Here, I begin on the larger piece of the bird.
Spray, circular motion, wipe off the paper.
This next picture has about 2 layers gone.
Keep going.... it's kind of a meditational thing to do-
if the image stays put. Otherwise lots of thoughts come to mind that aren't so meditational. Such as, "Why am I doing this anyway?" "I'll have to paint over this AGAIN???" "How many trashed canvases can I justify?"
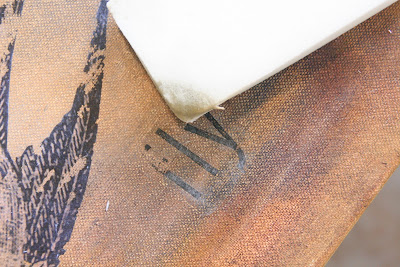
Now I'm getting to the end. Do you see the word above? It looks like it has a slight haze over it. That means it has more paper that needs to come off. This is where a Mr. Clean Magic Eraser comes in handy. Remember, light, circular motions.
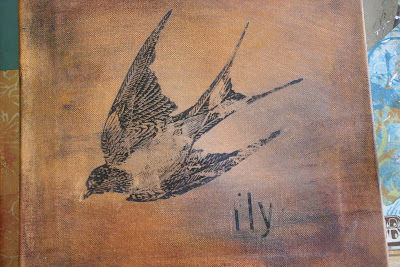
Here it is all wiped off. Not too bad, but I will need to fix up the "f" on the word fly. The bird is missing some tail feathers, and a bit of his lower wing. This can be incorporated into your design if you like an old, chippy look. I can drive myself absolutely crazy with detail, but I enjoy the aged look so this is a good thing for me!
I am not, not (!) an expert at this by any means. But It's fun to learn together, and help each other with our mistakes.
Julie's on-line classes are very helpful and I like to look through a Google search to see what others have come up with for transferring images.
Let me know if you try this and what you think!
~Lynn
bird graphic courtesy of The Graphics Fairy.
word "fly" from downloaded rsmith-mixed goodies.
Linking up to


Well, it looks like you are making progress, Lynn!
ReplyDeleteI like the old, chippy look.
{like when I look in the mirror...}
I really do love the background on this piece...my type of colors!
lynn,
ReplyDeletei see lots of progress here! good job! i know you can work this one into a nice collage and the next will be even better. I have a book of image transfer. Many different kinds. It is something I would love to try some time!
love,
suz
I think hhat I'm going to love the finished piece. I also think that it would be something that took more talent and definitely more patience than I seem to have, but this still makes me want to try it.
ReplyDeleteAnd I love the chippy look, too.
thank you for doing this first, and sharing! i've been wondering about this technique, but knew there had to be more to it than what the "professionals" show...now i'm ready to try!
ReplyDeleteYou want to know how slow I am? I kept trying to figure out why you put ily with the bird! This process amazes me. I would love to try it sometime.I've seen it done on fabric too with something called citrasolv? I have not found any of it yet.
ReplyDeleteThis is looking awesome! I love the bird! Thanks for visiting and your nice comments!
ReplyDeleteLooks like you were successful this time around! Practice DOES make perfect, and you're giving me hope that I can do a decent transfer too1 Hugs, Terri xoxo
ReplyDeleteI can see where you are going now...I love the look! It'll be worth all your time!
ReplyDeleteLove your birdie Lynn...I enjoy the mystic look it is easy to get with gel transfers...you are brave to try words too!
ReplyDeleteJulie P is such a great and inspiring teacher...I have enjoyed every class I have taken with her!
Happy Sunday
oxo
Looks like a Jewel to me friend!!! I want to make one with you soon!!!
ReplyDeleteHugs from the arctic wasteland & yes...a tree is still on top of my house...argggghhhhh.....
Hugs,
Me
Wow Lynn! I am just so impressed! In every way you are creative...in writing, decorating and crafting/artistry. You always amaze me!
ReplyDeleteVanessa
te he, I thought it ily was someone's name!! ooops!
ReplyDeleteLoving the vintage look - I don't think it needs any touching up at all... has a look of old embossed leather...